Organization Admin Help Center
Configure WVU, approve students, and release portfolios to faculty reviewers
Quick links
Sign in
All roles use the same login page with your org-admin email and password.
- Go to https://rubriqflow.com/login (or /login on your environment).
- Enter your WVU org-admin email and password.
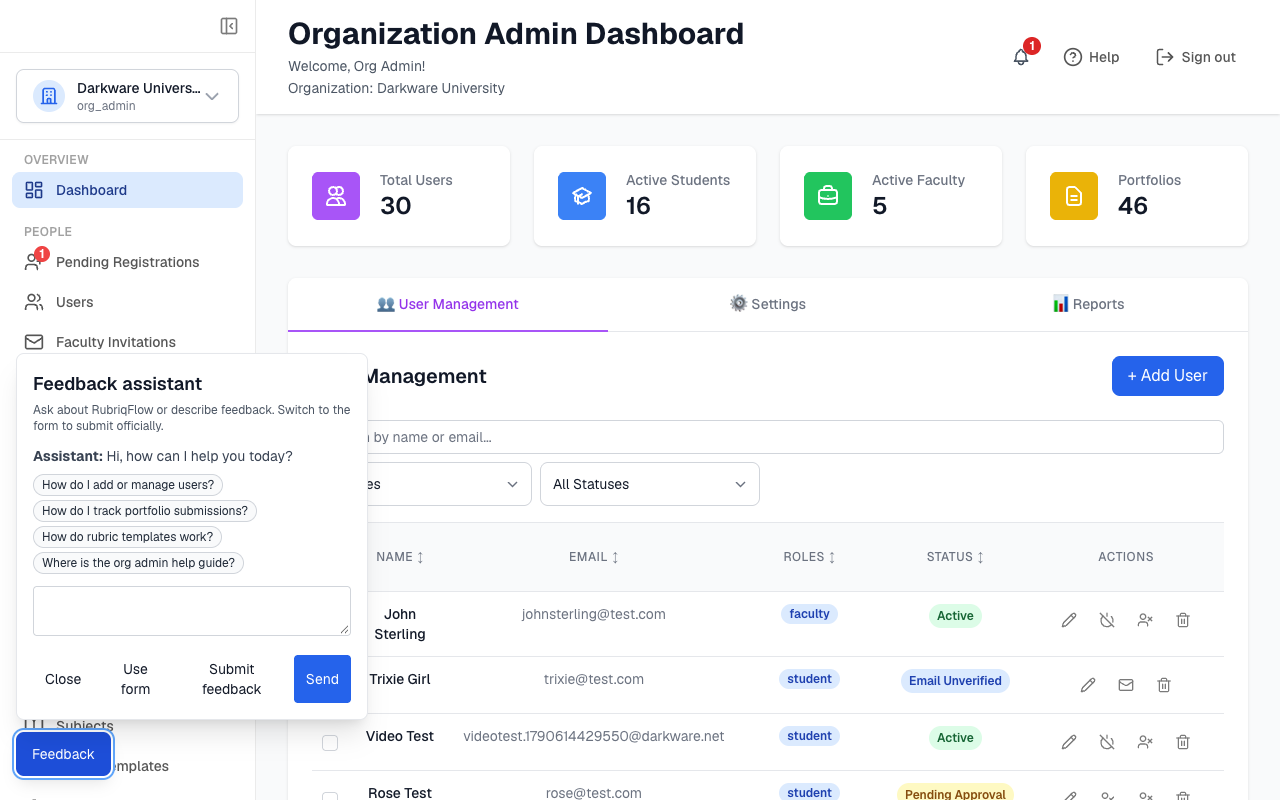
- Confirm you reach the Organization Admin Dashboard with the sidebar navigation.
Review release settings
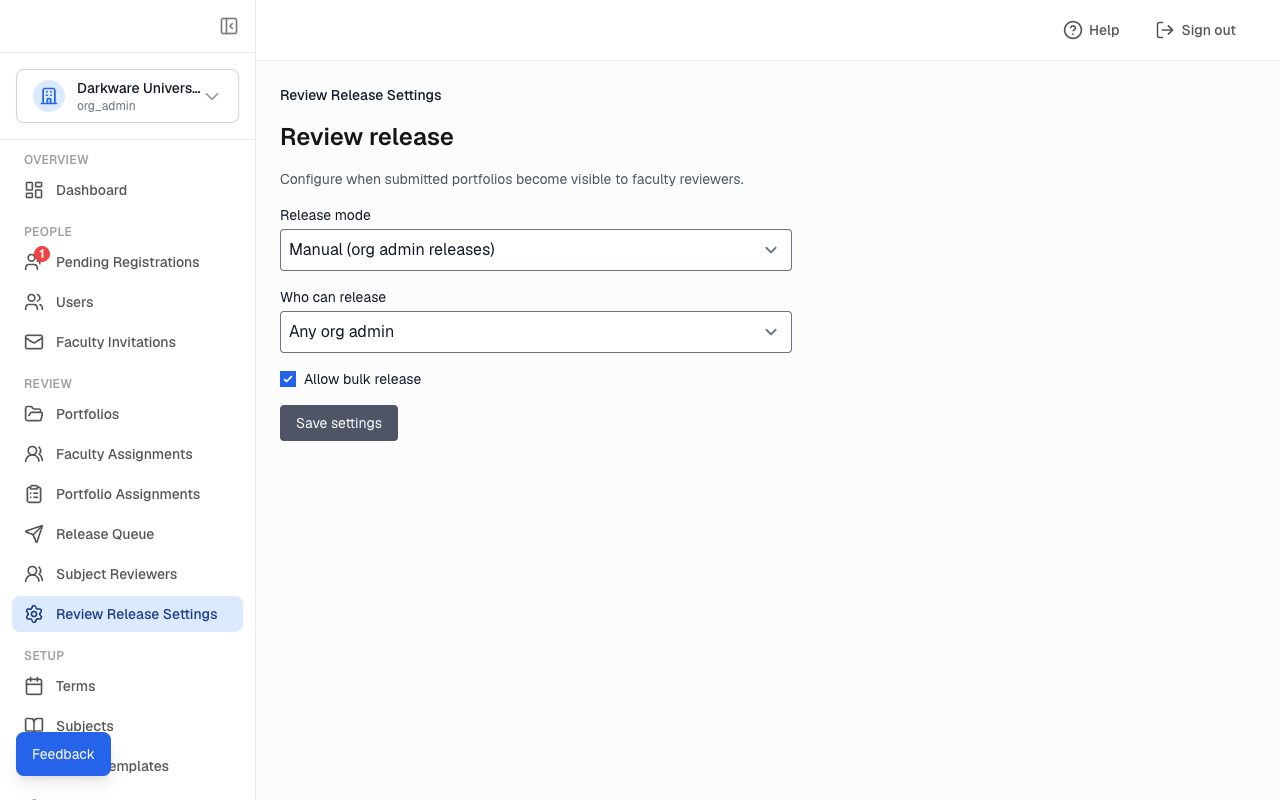
Choose how submitted portfolios reach faculty. In Auto mode, faculty assigned to the subject get the portfolio and an email as soon as the student submits. In Manual mode (used by WVU), submitted portfolios wait in the Release Queue until an org admin sends each one to a reviewer. Recommended only works like Manual, but a portfolio must be marked Recommended before it can be sent.
- In the sidebar, open Review Release Settings.
- Set Release mode to Auto (release on submit), Manual (org admin releases), or Recommended only.
- Set Who can release to Any org admin, or choose Named org admins only and tick the admins who may send portfolios.
- Tick Allow bulk release if admins may send every Recommended portfolio in a term at once from the Release Queue. Click Save settings.
Terms and subjects
Students pick a subject when they create a portfolio. Each new portfolio is filed under the current term.
- Open Terms in the sidebar. Click Generate Fall/Spring to create terms through the year you enter, or + Create Term to add one.
- Click Set current (star icon) on the term in progress.
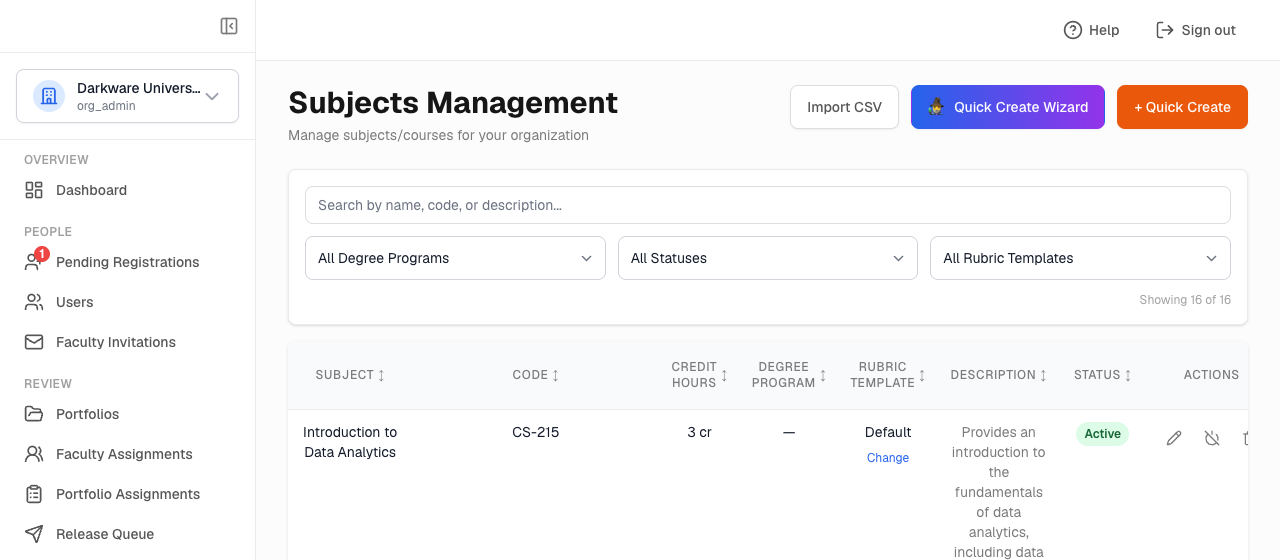
- Open Subjects and add courses with Import CSV or + Quick Create. Enter credit hours as a fixed number (3) or a range (0-3), from 0 to 18.
- The Rubric Template column shows Default until you assign your own template. Click Change to pick another one.
- Only active subjects appear when students create a portfolio.
Subject reviewers
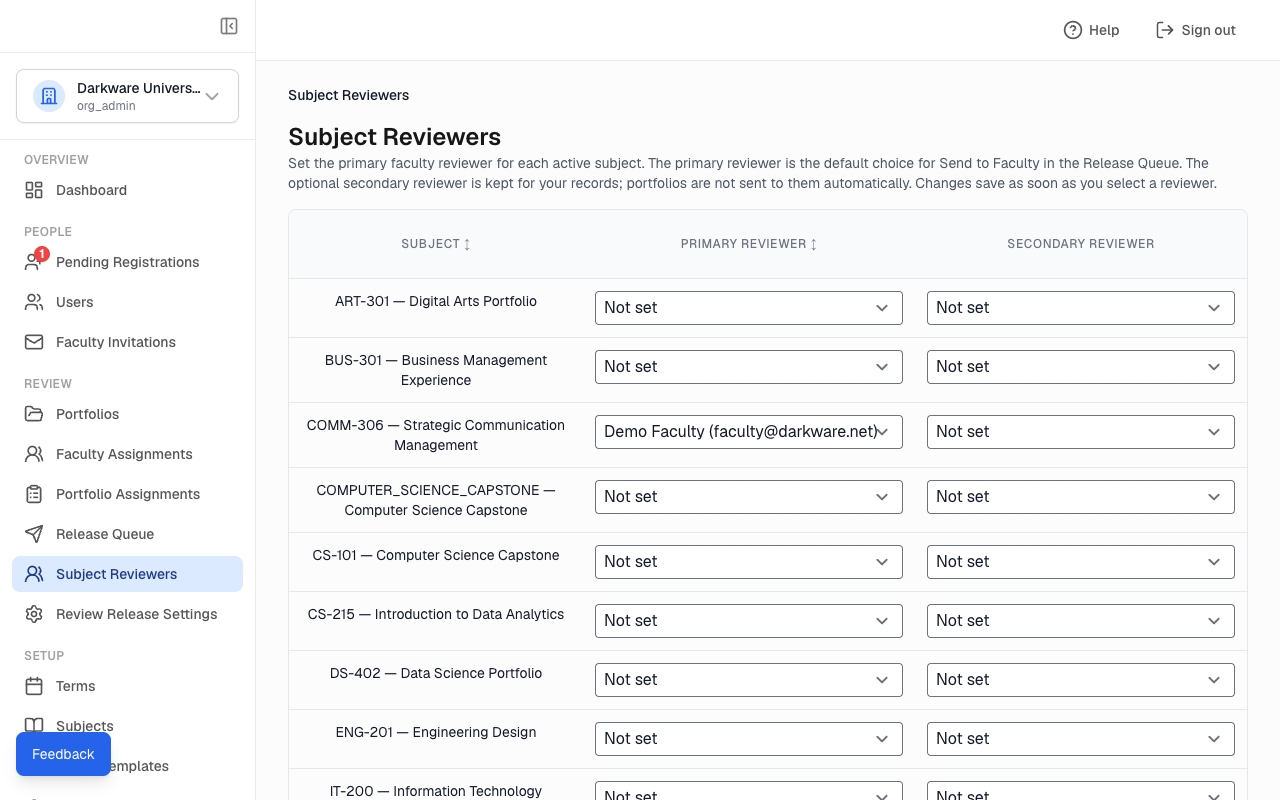
The primary reviewer is the default choice when you click Send to Faculty in the Release Queue, and bulk release sends to the primary reviewer.
- Open Subject Reviewers in the sidebar.
- For each active subject, choose a faculty member under Primary reviewer. Your choice saves as soon as you select it; there is no Save button.
- Secondary reviewer is optional and is kept for your records. Portfolios are not sent to the secondary reviewer automatically.
- If a reviewer is missing from the list, invite them from Faculty Invitations first.
Rubric templates
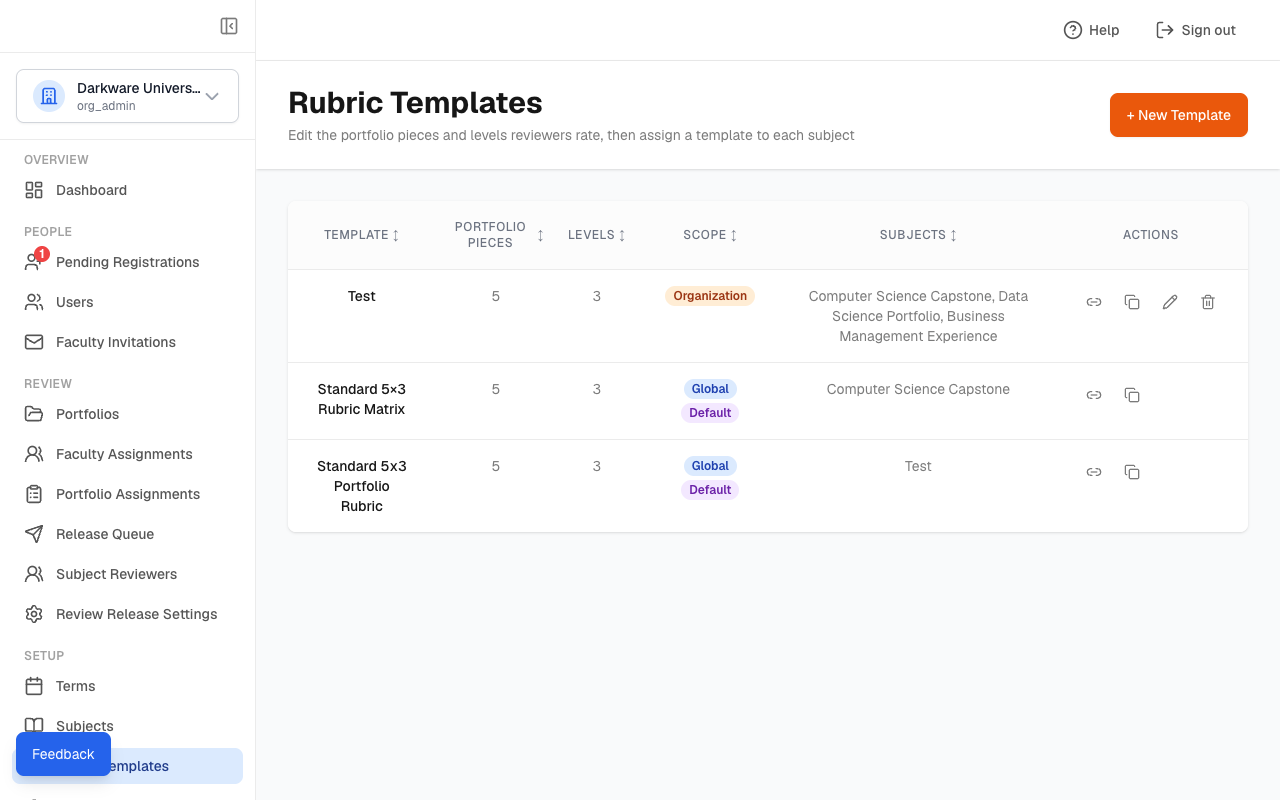
The rubric lists the portfolio pieces and levels reviewers can rate. The built-in default has five pieces (Resume/CV, Cover Letter, Narrative, Work Exhibits, Letters of Recommendation) and three levels (Unsatisfactory, Intermediate, Excellent). Ratings are optional and carry no weights; reviewers enter the credit hours they approve. The default is shared by all organizations and cannot be edited, so change a copy of it.
- Open Rubric Templates in the sidebar and click Duplicate (copy icon) on the default template.
- Click Edit (pencil icon) on your copy to rename it and change the piece names, level names and descriptions, then save.
- Click Assign (link icon) and choose a subject, or use Change in the Rubric Template column on Subjects. Repeat for each subject.
Faculty invitations
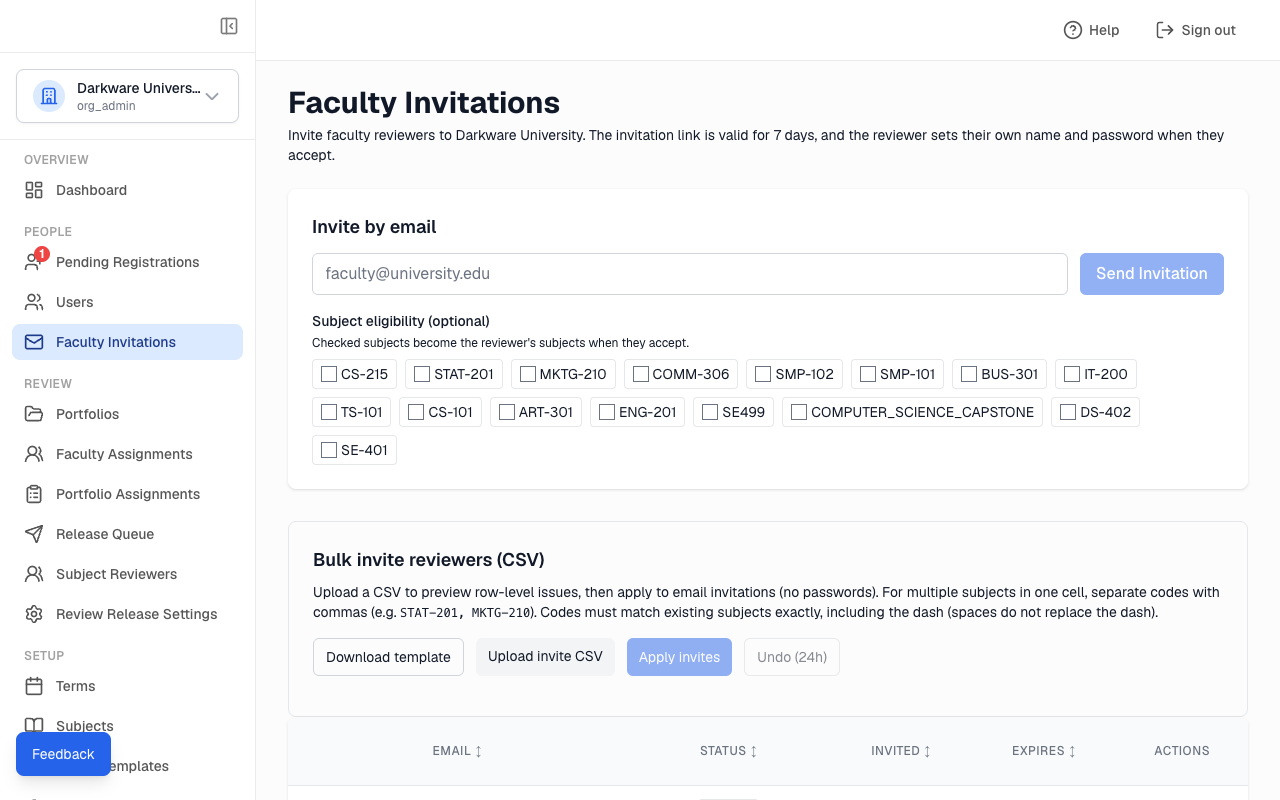
Invite faculty reviewers by email. The invitation link is valid for 7 days. The reviewer sets their own name and password when they accept.
- Open Faculty Invitations in the sidebar.
- Enter the reviewer's email. Under Subject eligibility (optional), tick the subjects they will review; these become their subject assignments when they accept. Click Send Invitation.
- To invite many reviewers, click Download template under Bulk invite reviewers (CSV). Put subject codes in the Subject Code(s) column, separated by commas (for example STAT-201, MKTG-210). Then click Upload invite CSV and Apply invites.
- In the invitations table, click Resend to email a new link that is valid for another 7 days, or Revoke to stop the link from working.
- After they accept, reviewers sign in at /login.
Pending registrations
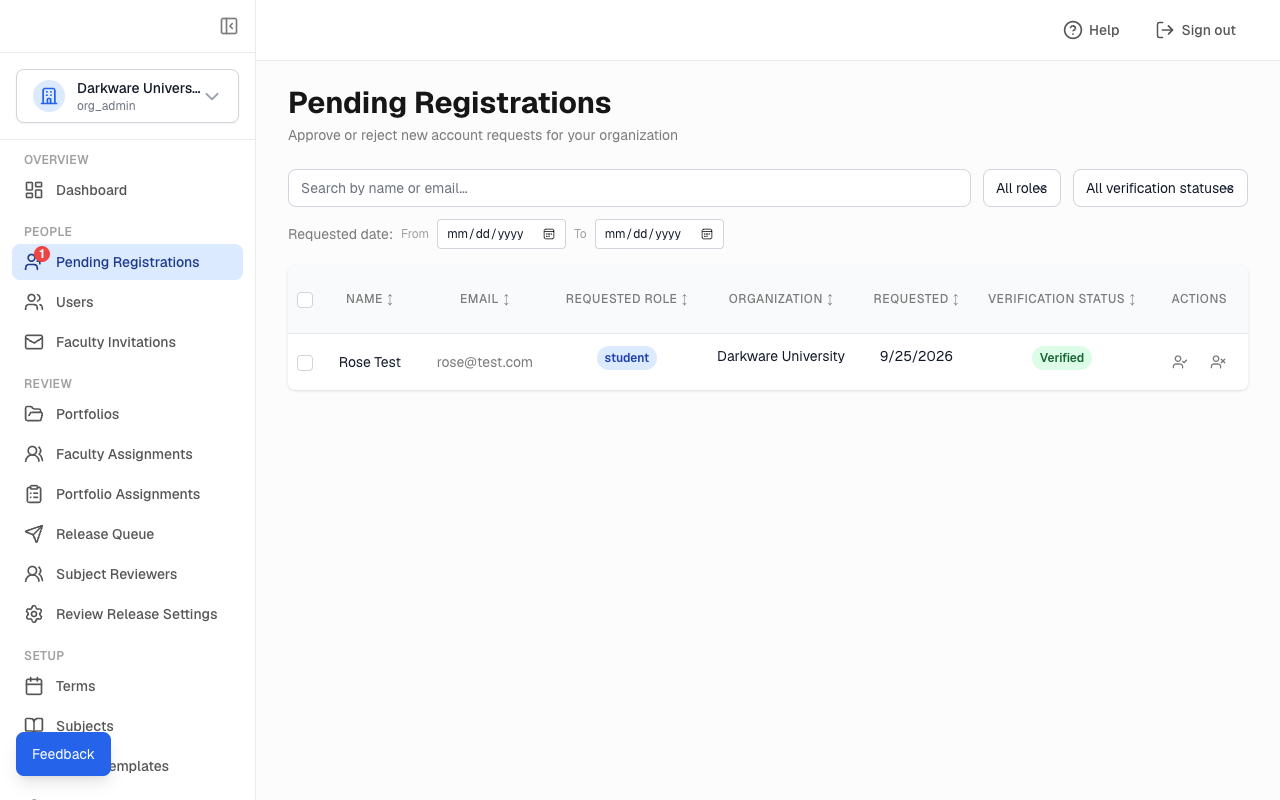
Approve verified student registrations so they can sign in and create portfolios.
- Students register at /student/register with a school email and verify their address.
- Open Pending Registrations in the sidebar and check the Verification Status column.
- Click Approve on each eligible row, or tick several rows and click Approve Selected.
- A Not Verified row cannot be approved yet. Clicking Approve on it asks whether to resend the verification email; click Yes to resend it.
Release queue and Send to Faculty
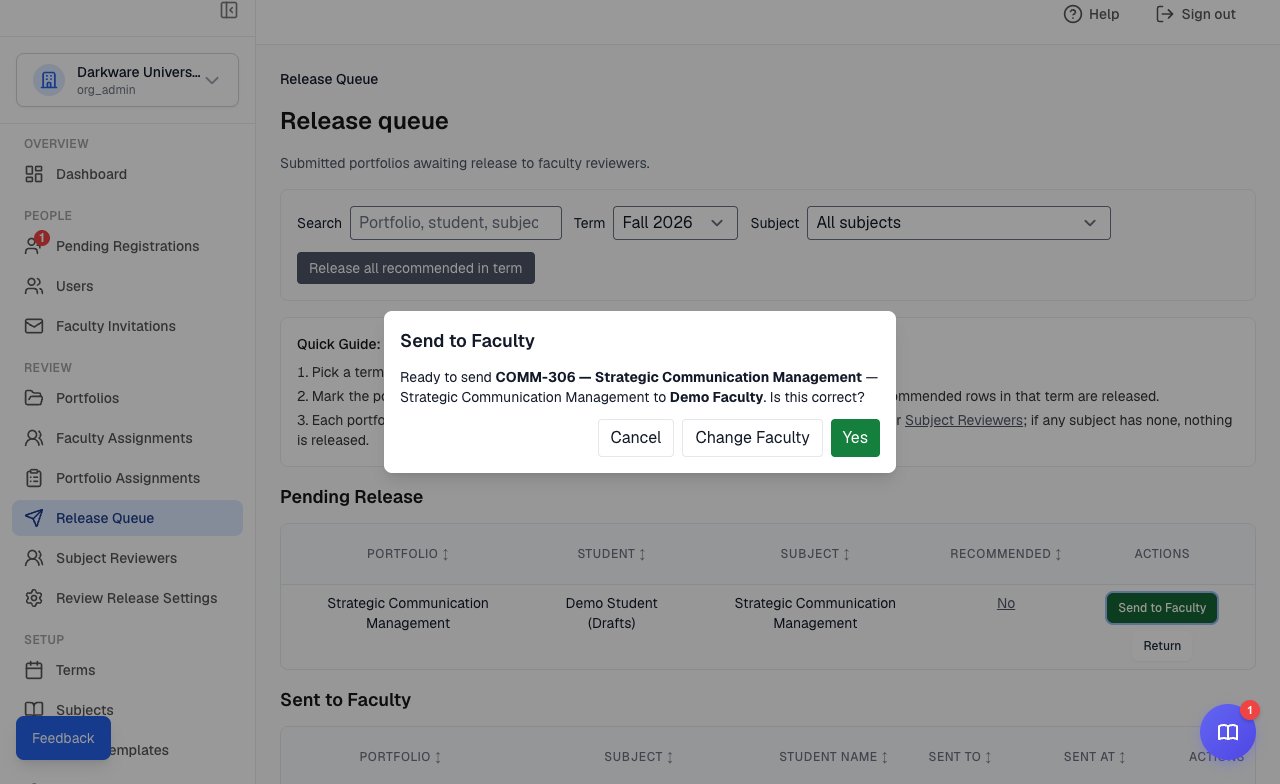
In Manual and Recommended only modes, submitted portfolios wait under Pending Release until an org admin sends them to a faculty reviewer or returns them to the student. A reviewer sees a portfolio only after it is sent to them. The Release Queue is not used in Auto mode.
- Open Release Queue. The Term filter starts on the current term; use Search, Term, and Subject to narrow the list.
- Click Send to Faculty on a row. Click Yes to send it to the subject's primary reviewer, or Change Faculty to pick another faculty member assigned to the subject or Add a new reviewer by email.
- Click Return to send a portfolio back to the student with a note. The student can edit and resubmit it. Return also works on rows under Sent to Faculty and removes the reviewer's access.
- Click No or Yes in the Recommended column to change whether a portfolio is Recommended. In Recommended only mode, a portfolio must be Recommended before it can be sent.
- If Allow bulk release is on, pick a term and click Release all recommended in term. Only Recommended rows are sent, each to its subject's primary reviewer.
- Sent to Faculty shows who received each portfolio and when. Returned to Student shows each return with its note and who returned it.
Product feedback
Send product suggestions or issues to the RubriqFlow team from the app.
- Click the Feedback button at the bottom-left of the screen. The book button at the bottom-right opens tutorials.
- Describe your suggestion or issue with enough detail for the team to reproduce it. You can add a screenshot or record your voice.
- Click Send. You can also email support@rubriqflow.com for follow-up.
- The Feedback page in the sidebar lists feedback sent by students, faculty, and org admins in your organization.
More help
Email support@rubriqflow.com